Friday, 23 January 2015

Favourite Bloggers-January 2015


Heya!
Today I'm going to share with you my favourite bloggers of the moment.

Lauren Conrad- Lauren's blog is one that I've only recently come across but I have fallen in love with it. She write about a range of things from getting fit to crafts.
Pips Tips- Pippa is one of my friends but I do really enjoy reading her blog. She doesn't post that often but when she does they are really interesting to read.
Fashiionistah- This is another blog that I have only recently descovered; it's really professional and predominantly fashion related. 
Al and Becs- I know this blog is written by two of my best friends but I do generally love their posts on fashion, beauty and lifestyle.
It's Thursday Tho- This is a fashion blog written by Betsy Blue. I love her style and her posts are always really lovely to read.

Charlotte x

Wednesday, 14 January 2015

My Nail Polish Collection

Hello Everybody,
I hope you've not given up on your New Years resolutions yet! I thought that I would show you I'm not the sort of girl who has her polishes from the same brands I like to have a mixture.
Reds
I only actually own one red and it's runway red-y by Sally Henson it's really strong in colour so you only need one coat.
Greens and Turquoise
All of these polishes are probably in my favorite 5 they are all really pretty colors.
Blues and Teals
I often use these as my go to nail colors when I'm not sure what color to pick because they're darker they go with a lot of things as well.
Purples
My favorite purple is probably the one in the middle it's from Avon and it's actually a magnetic polish so you can have lots of different patterns on your nails quite easily.
Pinks
I like pale pinks in the spring or when I just want a little, subtle bit of colour on my nails.
Glitters
I often use these to create a simple accent nail but my favorite is probably the one in the middle it's got quite big chunks of blue glitter and it looks really pretty with a teal polish. 
Base and top coats 
I use the nail builder gel often after I've taken off a polish just to re-hydrate my nails and strengthen them. The Barry M one I use as a base coat, top coat and just by itself when I'm at school because you aren't allowed nail polish!
Keep those resolutions up,
Charlotte x 

Thursday, 1 January 2015

Happy New Year!

Happy New Year Everybody! 
This is the first post of 2015 so I thought I would share a cute little DIY with you.
So this is just a really quick and simple little memory jar. 
All you need is an empty jar, a sharpie and some decorations like washi tape and ribbons. You want to remove the label from the jar and then decorate it however you want to.
I used washi tape, string and ribbon I wrote 2015 on it but you could write whatever you want. Now whenever you have a fun day with your friends or a laughing fit at lunch you can write it down fold it up and place it in the jar and then at the end of the year you can open them all up and remember all of the good times from that year.

Let me know what your New Years resolutions are in the comments, bring on 2015!
Charlotte x

Tuesday, 23 December 2014

Last Minute Festive Treats and Gifts

Hey guys,
So today on Christmas eve eve I thought I would share with you some quick and easy last minute sweet treats if you need something for your party or you need a gift for someone I have two festive treats for you.

The first thing I'm going to show you how to make is peppermint bark its a cute little chocolaty Christmas treat.

You will need:
1200g of white chocolate (twelve 100g bars)
600g of dark chocolate or milk chocolate if you'd prefer (six 100g bars)
12 peppermint flavoured candy canes 

A baking tray
Grease proof paper
A ziplock bag
Two glass bowls
A sive
Two tablespoons
Two spreaders
A teaspoon

Okay so before we get started we need to put the Christmas music on to get us in the festive mood. I'm in love with the Michael Bublé Christmas album.


So you want to start by lining the baking tray with greaseproof paper. 
Now you want to put half of the white chocolate in the microwave for 30 seconds at a time and stirring it in between until it is completely melted. Once it's melted pour it onto the tray and spread it out evenly and put it in the fridge to set. 
While its setting you want to place the candy canes into a zip-lock bag, seal it and smash them up. I used a tea spoon to break it up. Once it was all broken up I decided to sive it to separate the dust from the broken candy cane.
Once you've done that the first layer of chocolate should be set so you can melt the dark chocolate like we did before and then just pour it straight on top of the first layer of chocolate and I decided to sprinkle the candy cane dust on top of this layer before I put it in the fridge to set.
When that layer has set we can melt the other half of the white chocolate as before and then pour it on top of the dark chocolate layer and then you want to sprinkle the candy cane bits on top them put it back in the fridge for a final time to set. 
Once it's all set you want to chop it up I neatened up the edges and then cut it into little
chunks. You may need to ask an adult to help you with cutting it up as I had to get my mum to cut it up for me as it was really tough but we did leave it over night in the fridge so that might have affected it.
 You could place them on a plate the chunks in little cupcake cases to serve as a sweet treat at your Christmas party.

This can also make a great gift you could just wrap them up with cellophane or you could simply make a small one. 
To make a small peppermint bark you do the exact same thing except with roughly 3 bars of white chocolate and 1 bar of dark chocolate (100g bars) and just three candy canes.


So the next thing I'm going to show you how to make is a super cute hot chocolate kit.
You will need  (for one):
Hot chocolate powder
Mini marshmallows
A candy cane

Two piping bags 
Two mini rubber bands
Festive washi tape
Curling ribbon

So you want to fill up a piping bag with hot chocolate I put in 4 teaspoons but just follow the amount on the back of the container. You want to tie that off with a rubber band, trim it down and place it inside another piping bag.
You then want to pour marshmallows into the bag until you can't see the top of the first piping bag then you want to tie the top with an elastic.
Now you want to decorate it I put some curly ribbon round the top and added a candy cane with some festive tape.
You could put it with a Christmas mug to give as a gift to someone.

I hope this has helped you if you were stumped on what to get something to finish off someone's present
Merry Christmas,

Charlotte x

Wednesday, 17 December 2014

Christmas Nails

Hello everyone, 

So I broke up from school for the Christmas holidays yesterday and were only eight days away from Christmas and one of my favourite things to do is paint my nails for Christmas and so I thought I'd share a Christmassy nail design with you that you can achieve in just four easy steps.


You will need:

Nail polish remover
Red nail polish - Sally Henson Runaway Red-y
Top coat - Barry M
Gold glitter polish - Colour Unlimited Nail Polish
Makeup sponge
Cotton buds

Step 1
Start by painting your nails red I did two coats to make it more vibrant

Step 2
Paint the glitter on to the sponge putting more at the bottom so it will have a gradient effect. Then dab the sponge on the bottom on the nail to transfer the glitter.


Step 3

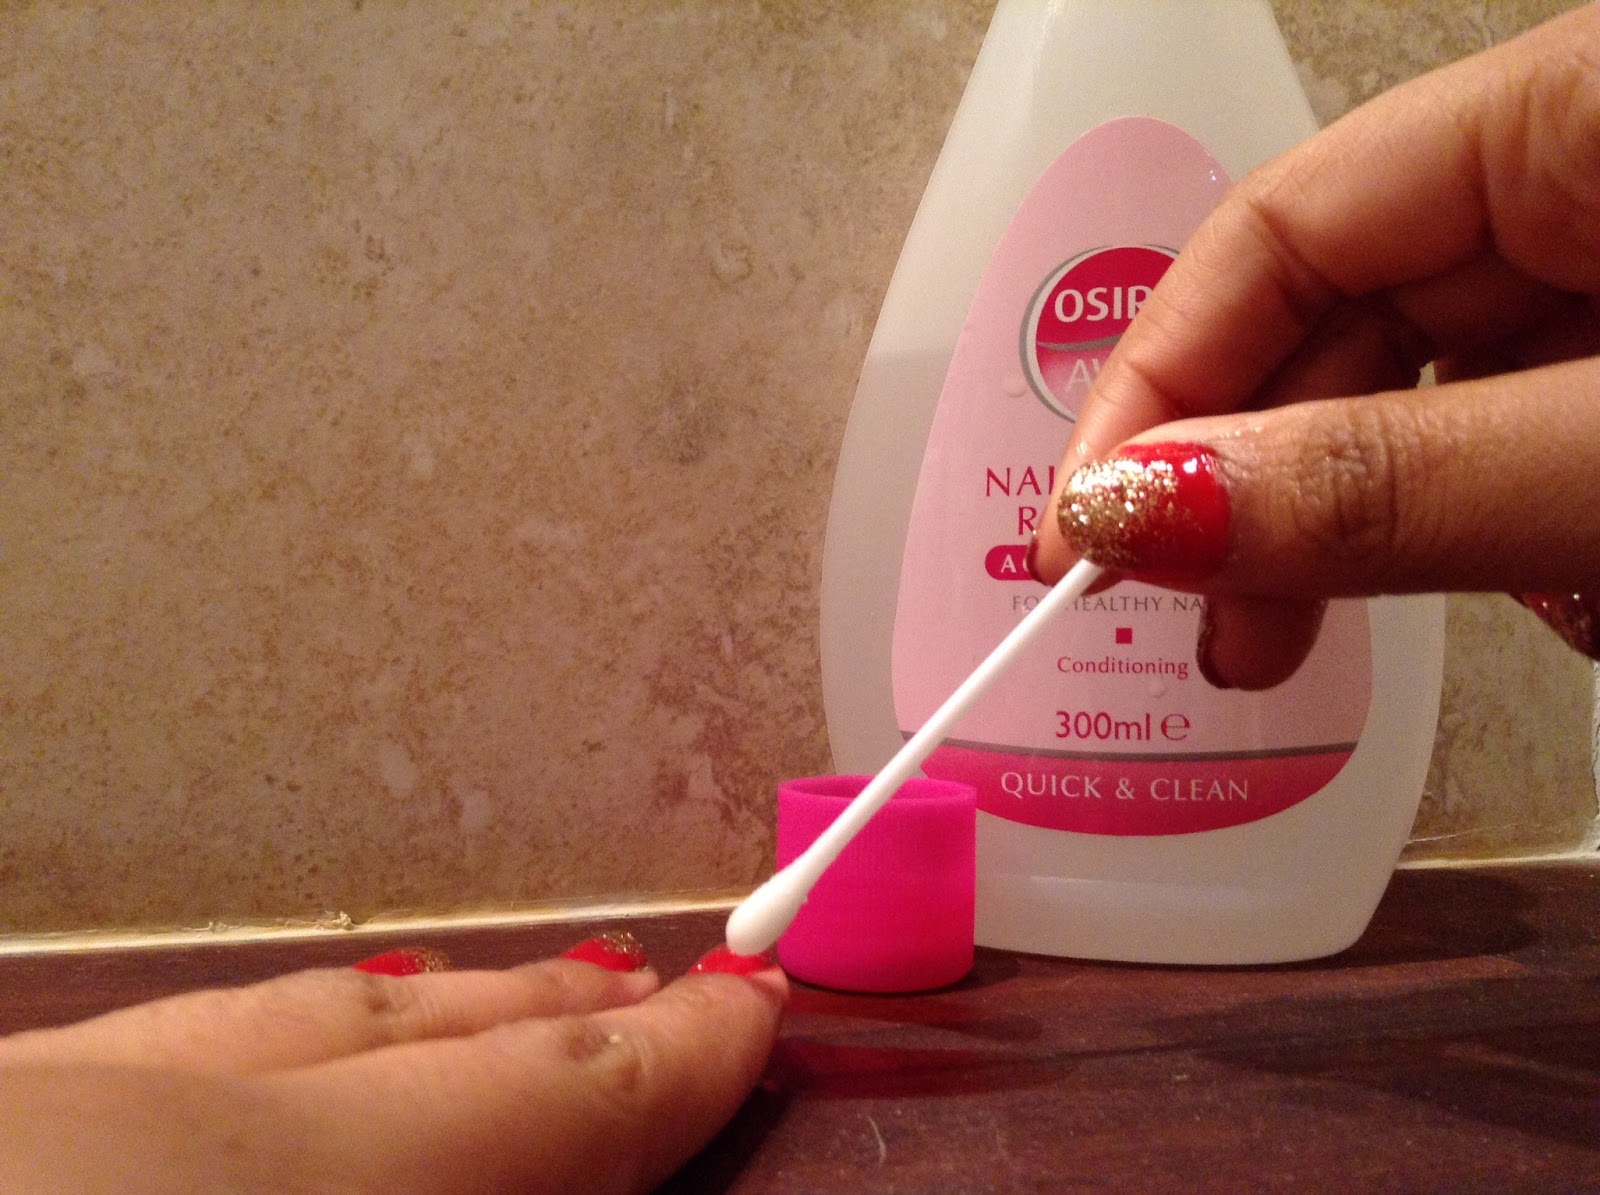
Dip the cotton bud in nail polish remover and clean up around the edges.

Step 4
Apply a top coat to protect your design and your finished! You have beautiful nails for Christmas time.


Have fun painting your nail in this Christmassy design
Charlotte x